Age Verification
This website contains age-restricted material including nudity and explicit content. By entering, you confirm being at least 18 years old or the age of majority in the jurisdiction you are accessing the website from.
Our parental controls page explains how you can easily block access to this site.
0
Discussions for Scenes for Version 1.2.X Fullscreen Mode here Forum / Alles über iStripper
Z22
Mitglied seit in Aug 2017 1166 Beiträge
11. November 2017 (edited)
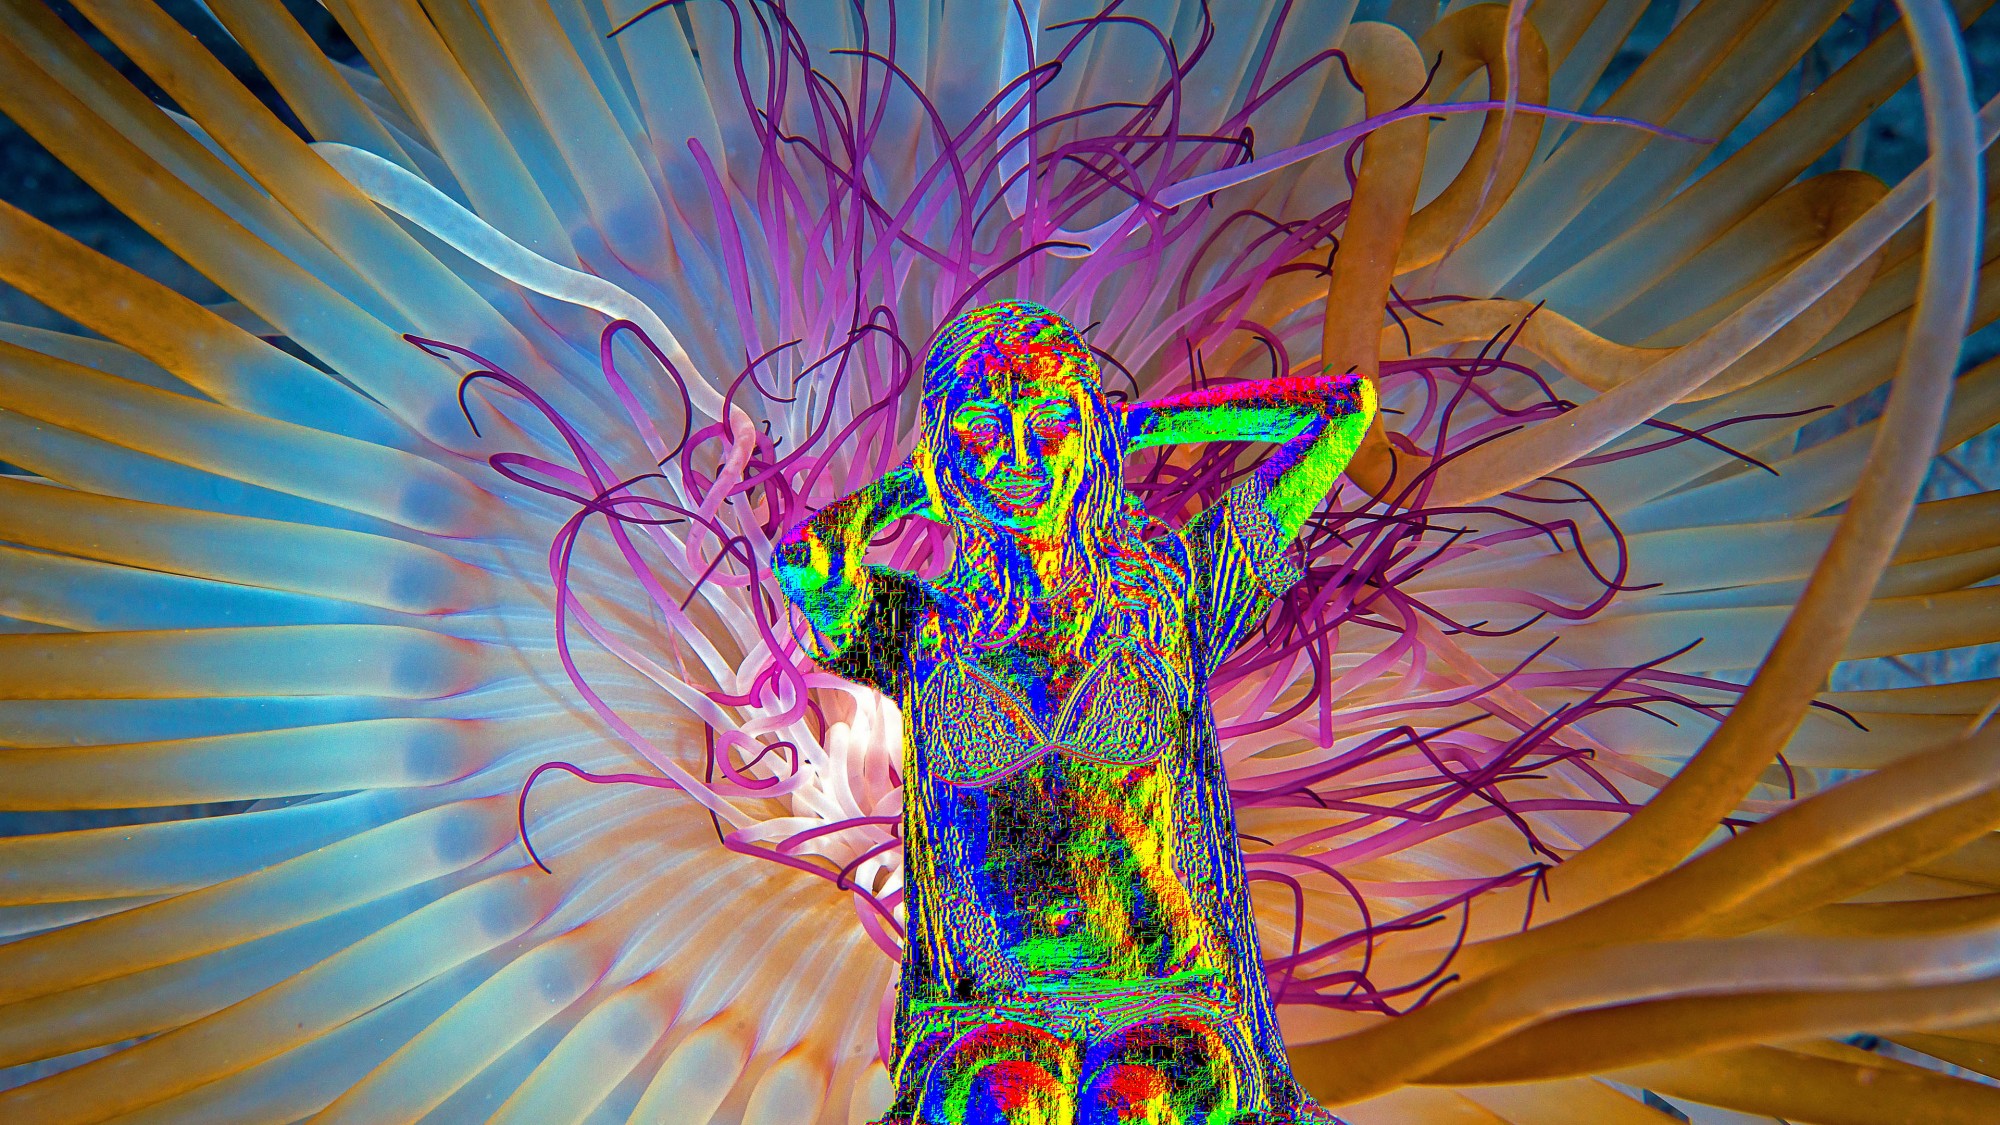
Prismatic version of glass4.fsh
//By Z22, suggested fixes by TheEmu
uniform sampler2D texture0;
uniform vec2 textureSize0;
vec2 vTexCoord = gl_TexCoord[0].xy;
///////////////////////////////////////////////////////////////////////////////////////////
vec2 Glass(vec2 *****)
{
// Get a float offset that equates to 1 pixel in the x and y
//(20.0) overkill chrome, (10.0) bit like dichroic glass, (0.25) very low *****.
vec2 Offset = vec2(1.0) / textureSize0;
// Use the Offset for the lookup of r,g,b
vec4 G1 = texture2D (texture0, vTexCoord.xy + Offset*vec2( 0.0,-1.0));
vec4 G3 = texture2D (texture0, vTexCoord.xy + Offset*vec2(-1.0, 0.0));
vec4 G4 = texture2D (texture0, vTexCoord.xy + Offset*vec2( 0.0, 0.0));
//Combine r,g,b
float CastFix0 = ( ( 2.0*((G1.r + G1.g + G1.b)*0.333)) -1.0);
float CastFix1 = ( ( 2.0*((G3.r + G3.g + G3.b)*0.333)) -1.0);
float CastFix2 = ( ( 2.0*((G4.r + G4.g + G4.b)*0.333)) -1.0);
// Posterize the colour range.
int iMul = 32;// Adjust "facets". Values between 32 and 64 look best imo.
int Gi1 = float(CastFix0*256);
float Gia1 = int(Gi1/iMul)*iMul;
float CastFix0M = float(Gia1/256);
int Gi2 = float(CastFix1*256);
float Gia2 = int(Gi2/iMul)*iMul;
float CastFix1M = float(Gia2/256);
int Gi3 = float(CastFix2*256);
float Gia3 = int(Gi3/iMul)*iMul;
float CastFix2M = float(Gia3/256);
//Combine position and (r,g,b)
vec3 Gray1 = vec3(G1.x, G1.y, CastFix0M);
vec3 Gray3 = vec3(G3.x, G3.y, CastFix1M);
vec3 Gray4 = vec3(G4.x, G4.y, CastFix2M);
vec3 cp0 = ((1.0+Gray4)*0.5) * ((1.0+Gray1)*0.5);
vec3 cp1 = ((1.0+Gray4)*0.5) * ((1.0+Gray3)*0.5);
// Use to offset float x and y
vec3 combo = (cp0 + cp1)*0.5;
float x = (((2.0*combo.r)-1.0) + ((2.0*combo.b)-1.0)* 0.5) * (Offset.x*128.0);
float y = (((2.0*combo.b)-1.0) + ((2.0*combo.g)-1.0)* 0.5) * (Offset.y*128.0);
*****.x = (*****.x)+0.5 ; //Horizontal offset
//Combine the offsets and return out of Wibble routine.
return vec2(*****.x+x, *****.y+y);
}
///////////////////////////////////////////////////////////////////////////////////////////
void main(void)
{
// Fake chromatic abberation effect.
float Rs = 0.999;
float Gs = 0.997;
float Bs = 0.995;
float ColorR = (texture2D(texture0, Glass(vTexCoord*Rs)).r) ;
float ColorG = (texture2D(texture0, Glass(vTexCoord*Gs)).g) ;
float ColorB = (texture2D(texture0, Glass(vTexCoord*Bs)).b) ;
gl_FragColor = vec4(ColorR, ColorG, ColorB, 1.0) ;
}
//Enjoy! :D Z22.
TheEmu
Mitglied seit in Jul 2012 3309 Beiträge
11. November 2017 (edited)
@Z22 - About 5 hours ago you asked
The answer is no, length returns the geometrical length of the vector, i.e. the square root of the sum of the squares of its components, length(vec3 (0.5,0.25,0.15)) = sqrt(0.25+0.0625+0.0225) = sqrt(0.335) = 0.57879.
Another simple alternative would be to use dot(G0,G0) etc. to take the dot product of the vectors with themselves, this would return the sum of the squares of the components, i.e. the square of the length.
Or you can throw in some other functions such as pow, which raises its first argument to the power of its second, for example
pow ( length(G0), 2.0 )
which squares the length or
length ( pow(G0,2.0) )
which squares each component and then takes the length.
I find the pow function is useful in cases like this where the first argument should be in the range 0.0 to 1.0 because it does not change the range but either compresses things at low values (decreasing the sensitivity to changes) and stretches them at high values (increasing the sensitivity to changes) or vice versa depending on the value of its second argument.
I havn't looked at your later posts yet due to the effects of red wine at lunch time.
The second argument to pow can be positive or negative but the first argument should be positive or zero (which it will be for a valid colour which you should get from texture2D).
Does length just add the rgb values together then? so (0.5, 0.25, 0.15) would equal 0.9?
The answer is no, length returns the geometrical length of the vector, i.e. the square root of the sum of the squares of its components, length(vec3 (0.5,0.25,0.15)) = sqrt(0.25+0.0625+0.0225) = sqrt(0.335) = 0.57879.
Another simple alternative would be to use dot(G0,G0) etc. to take the dot product of the vectors with themselves, this would return the sum of the squares of the components, i.e. the square of the length.
Or you can throw in some other functions such as pow, which raises its first argument to the power of its second, for example
pow ( length(G0), 2.0 )
which squares the length or
length ( pow(G0,2.0) )
which squares each component and then takes the length.
I find the pow function is useful in cases like this where the first argument should be in the range 0.0 to 1.0 because it does not change the range but either compresses things at low values (decreasing the sensitivity to changes) and stretches them at high values (increasing the sensitivity to changes) or vice versa depending on the value of its second argument.
I havn't looked at your later posts yet due to the effects of red wine at lunch time.
The second argument to pow can be positive or negative but the first argument should be positive or zero (which it will be for a valid colour which you should get from texture2D).
Z22
Mitglied seit in Aug 2017 1166 Beiträge
11. November 2017
ewwwwww
TheEmu
Mitglied seit in Jul 2012 3309 Beiträge
11. November 2017 (edited)
@Z22
If qq is a float value or a vector of floats and N and integer, or better a float with an integer value, then
qq = qq - mod(qq,1.0/N);
should produce the effect you want. The mod function returns the remainder from dividing its two arguments, in this case the second argument is the width of the bands you are trying to split the colours into so the mod function returns how far into a band qq was and subtracting that reduces qq to the value at the start of the band that it is in.
This is not only a shorter bit of code it avoids having to do any integer arithmetic, which is surprisingly slow on some GPUs (such as my NVIDIA GPU)
As a final twist, you could do something like
const vec3 W = vec3 ( 1.0/10.0, 1.0/20.0, 1.0/30.0 );
qq = qq - mod(qq,W);
which would simultaneously apply the effect to each of the colour components but using different numbers of bands for each component. Probably not very useful as an effect, but worth remembering as a technique.
Z22
Mitglied seit in Aug 2017 1166 Beiträge
11. November 2017
cool, thanks. will have to try some experiments with those to get them into my head a bit better than just reading about them.
I figured the way i was doing it with swapping to int and back again wasn't goint to be the fastest.
I figured the way i was doing it with swapping to int and back again wasn't goint to be the fastest.
TheEmu
Mitglied seit in Jul 2012 3309 Beiträge
11. November 2017 (edited)
@Z22
Another, even simpler, expression for reducing to colour bands would be
qq = floor(qq*N)/N;
the floor function rounds down to the next lowest whole number (without converting to and from an int).
There are other rounding functions
The difference between round and roundEven is in the way they handle inputs which are exactly half way between two whole numbers - in the case of round it is unspecified whether these round up or down while for roundEven the behaviour is fully specified but it might be slightly slower. For many purposes it doesn't matter which of the two is used but for serious work involving adding large numbers of values (e.g. when evaluating an integral) roundEven is better because the simpler form can introduce a small bias due to rounding these half way values in one direction whereas with the roundEven form these tend to cancel out in the long term.
For positive numbers floor and trunc return the same value, for negative numbers trunc rounds up while floor rounds down.
Related to the rounding functions are fract and mod. The results from these can be surprising when negative numbers are involved. They are defined to be
which means, for eaxmple, that fract(1.25) is 0.25 but fract(-1.25) is +0.75 which can be a surprise when you first encounter it.
Another, even simpler, expression for reducing to colour bands would be
qq = floor(qq*N)/N;
the floor function rounds down to the next lowest whole number (without converting to and from an int).
There are other rounding functions
- ceil which rounds up
trunc which rounds toward zero
round which rounds to the nearest whole number
roundEven which also rounds to the nearest whole number
The difference between round and roundEven is in the way they handle inputs which are exactly half way between two whole numbers - in the case of round it is unspecified whether these round up or down while for roundEven the behaviour is fully specified but it might be slightly slower. For many purposes it doesn't matter which of the two is used but for serious work involving adding large numbers of values (e.g. when evaluating an integral) roundEven is better because the simpler form can introduce a small bias due to rounding these half way values in one direction whereas with the roundEven form these tend to cancel out in the long term.
For positive numbers floor and trunc return the same value, for negative numbers trunc rounds up while floor rounds down.
Related to the rounding functions are fract and mod. The results from these can be surprising when negative numbers are involved. They are defined to be
- fract(x) = x - floor(x)
mod(x,y) = x - y*floor(x/y)
which means, for eaxmple, that fract(1.25) is 0.25 but fract(-1.25) is +0.75 which can be a surprise when you first encounter it.
Z22
Mitglied seit in Aug 2017 1166 Beiträge
12. November 2017
Ahh, found the problem i have been replicating in the .scn since i started
texture {
id: Girl
source: Clip
}
isn't a valid source so it just creates an empty buffer
i can change it to...
texture {
id: Girl
source:
}
And the effect (feedback) still works.
texture {
id: Girl
source: Clip
}
isn't a valid source so it just creates an empty buffer
i can change it to...
texture {
id: Girl
source:
}
And the effect (feedback) still works.
TheEmu
Mitglied seit in Jul 2012 3309 Beiträge
12. November 2017
@Z22 - do you even need to declare that texture at all? In the "final" scene you posted in the share thread you make no use of the Girl texture at all.
Z22
Mitglied seit in Aug 2017 1166 Beiträge
12. November 2017

It's a general error from the very first thing i posted and the reason why the acid series work at all.
If i hadn't tried to create a texture from the clip i don't think i would have discovered the feedback, and may not have been inspired to have a go at learning all this stuff. :D
If i hadn't tried to create a texture from the clip i don't think i would have discovered the feedback, and may not have been inspired to have a go at learning all this stuff. :D
TheEmu
Mitglied seit in Jul 2012 3309 Beiträge
12. November 2017
@Z22 - I have just had a proper look at the FlassFinal.scn file and have been able to simplify it somewhat. In particular reducing the number of framebuffers by two.
////////////////////////////////////////////////////////////////////////////////
clip {
id : Clip
deny : top
}
////////////////////////////////////////////////////////////////////////////////
texture {
id : BG
source : Backgrounds
size : 3840, 2160 // Force to a common size
}
////////////////////////////////////////////////////////////////////////////////
framebuffer
{
id : fb2
pos : 1920, 1080
size : 7680, 2160
sprite {
source : BG
pos : 3840, 0
blend : false
}
clipSprite {
source : Clip
pos : 0, 1080
blend : true
standingHeight : 1800
sittingheight : 1500
}
}
framebuffer
{
id : CleanGirl
pos : 1920, 1080
size : 3840, 2160
clipSprite {
pos : 0, 1080
source : Clip
blend : true
standingHeight : 1800
sittingheight : 1500
}
}
////////////////////////////////////////////////////////////////////////////////
framebuffer
{
id : ResizedDrip
pos : 1920, 1080
size : 3840, 2160
clipSprite {
pos : 1920, 0
source : fb2
shader : fragment, Glass4.fsh
blend : true
}
}
////////////////////////////////////////////////////////////////////////////////
camera {
type : 2D
pos : 1920, 1080
size : 3840, 2160
sprite {
size : 3840, 2160
source : ResizedDrip, 0
source : CleanGirl, 1
source : BG, 2
shader : Combine8.fsh
}
}
Z22
Mitglied seit in Aug 2017 1166 Beiträge
12. November 2017
Forgot i could put size in the texture node.
For messing about i will keep the BG buffer as i can ***** with the scale and colour ect.
Eg:-
framebuffer
{
id: fb0
pos: 1920, 1080
size: 3840, 2160
sprite {
opacity: 1
color: 1, 1, 1
scale: 1, 1
hotspot: 0.50, 0.499
size: 3840, 2160
source: BG
blend: false
animate: 3, pingpong, inoutsine, color, -0.1, 0.0, 0.0
animate: 4, pingpong, inoutsine, color, 0.0, -0.2, 0.0
animate: 5, pingpong, inoutsine, color, 0.0, 0.0, -0.3
}
}
from the prismatic version
Helps to animate the output sometimes to see whats going on.
TheEmu
Mitglied seit in Jul 2012 3309 Beiträge
12. November 2017 (edited)
@Z22 - I am not certain what you are trying to acheive with the Dust scenes, but one thing that stands out immediately is that the version of Combine.fsh that you are using expects to be fed three textures and you only give it two. It will pick up a third but in this scene what it will pick up is, I think, Dust2.
You need to use something like
sprite {
size: 3840, 2160
source: Dust, 0
source: Dust2, 1
source: Clip, 2
shader: Combine-Dust.fsh
}
Though more work seems to be needed elsewhere to get a sensible effect out of it.
You need to use something like
sprite {
size: 3840, 2160
source: Dust, 0
source: Dust2, 1
source: Clip, 2
shader: Combine-Dust.fsh
}
Though more work seems to be needed elsewhere to get a sensible effect out of it.
Z22
Mitglied seit in Aug 2017 1166 Beiträge
12. November 2017 (edited)
Hmm. Found what could be a tad of a bug. if i use 2 framebuffers which each use the same clip( clip {
id: Clip
deny: table, behindtable, fronttable, inout, cage, top
} ) they interact with each other.
Is there a way of using the same girl but 2 different clips?
This may have been why i tried to make a texture of the clip way back.
example
https://drive.google.com/open?id=1O9fyuypVs1y6Mmw91CTnTrl21yUSLBjp
Dusty2.scn
not cut down or optimised in any way as i was trying to find out what was wrong.
even though the combine is set to only output dust2(which is spin.fsh)
you can see the dust shader too.
TheEmu
Mitglied seit in Jul 2012 3309 Beiträge
12. November 2017
@Z22 - why do you have the dummy textures at all. I get exactly the same result if I delete them and use
with the same being done for the second feedback buffer.
If what you wanted was a plain black rectangle as the starting condition then delete the textures and just use a simple quad rather than a sprite. If I do the following it makes no difference that I can detect to the output and is a lot easier to understand.
framebuffer
{
id: FeedbackBuffer
pos: 1920, 1080
size: 3840, 2160
quad {
color: 0, 0, 0
hotspot: 0.5, 0.499
size: 3840, 2160
}
}
framebuffer
{
id: FeedbackBuffer2
pos: 1920, 1080
size: 3840, 2160
quad {
color: 0, 0, 0
scale: 1.01, 1.01
//hotspot: 0.5, 0.5
size: 3840, 2160
}
}
I do not know what you are expecting to see so I do not know why you think there is a problem.
framebuffer
{
id: FeedbackBuffer
pos: 1920, 1080
size: 3840, 2160
sprite {
opacity: 1
hotspot: 0.5, 0.499
size: 3840, 2160
// source: Feedback
blend: false
}
}
with the same being done for the second feedback buffer.
If what you wanted was a plain black rectangle as the starting condition then delete the textures and just use a simple quad rather than a sprite. If I do the following it makes no difference that I can detect to the output and is a lot easier to understand.
framebuffer
{
id: FeedbackBuffer
pos: 1920, 1080
size: 3840, 2160
quad {
color: 0, 0, 0
hotspot: 0.5, 0.499
size: 3840, 2160
}
}
framebuffer
{
id: FeedbackBuffer2
pos: 1920, 1080
size: 3840, 2160
quad {
color: 0, 0, 0
scale: 1.01, 1.01
//hotspot: 0.5, 0.5
size: 3840, 2160
}
}
I do not know what you are expecting to see so I do not know why you think there is a problem.
Z22
Mitglied seit in Aug 2017 1166 Beiträge
12. November 2017 (edited)
As i said, this is just trying to find why the problem exists at all. Any additions are there to narrow down the possibilities. hence the textures that aren't needed, i was testing to see if not having a texture in there was causing the bug. it isn't.
your code making no difference is the point. It shouldn't look the way it does.
The output atm should only show the spin shader but it is showing both the spin effect and the dust effect even though in the combine it is only outputting dust2.
gl_FragColor = Dust2;
the problem appears to be the double use of the Clip. It looks like the both the effects are writing to the internal buffer that Clip is in.
clipSprite {
pos: 0, 1080
standingHeight: 1800
source: Clip
blend: true
}
used in 2 different buffers that gets used in 2 different shaders.
TheEmu
Mitglied seit in Jul 2012 3309 Beiträge
12. November 2017 (edited)
But as far as I know NEITHER of them should a have anything writting anything to them. I don't think its even possible to do so.
Also, your spin shader expects two textures as input but you only feed it one, so it picks up the second "by accident" from somewhere. I really ***** this "feature" of the scene file/shader interface, I would much rather have to specify all of the sources and get an error if I left one out.
Also, your spin shader expects two textures as input but you only feed it one, so it picks up the second "by accident" from somewhere. I really ***** this "feature" of the scene file/shader interface, I would much rather have to specify all of the sources and get an error if I left one out.
Z22
Mitglied seit in Aug 2017 1166 Beiträge
12. November 2017
Yeh, thats why i thought it was weird. It shouldn't be doing what it is. When i wanted to use 2 clips for 2 normalmap shaders to make different detail level outputs to be combined it did the same type of thing. Though that was one or the other would render but not both.
It could be related to the other bug with 2 textures into 1 shader that was having problems with, why i resorted to a double wide texture in glass. Something funny going on with how it handles textures/clips, or my understanding of it... :/
Removing the second texture from spin made the iq better. odd that it used it at all.
At least i now know i can't do this so will have to work round it.
Z22
Mitglied seit in Aug 2017 1166 Beiträge
12. November 2017
Can a clip be pasted onto a quad?
TheEmu
Mitglied seit in Jul 2012 3309 Beiträge
12. November 2017 (edited)
@Z22 - just nest a clipSprite node in the quad node.
Here is a simple example that uses no shaders.
////////////////////////////////////////////////////////////////////////////////
// License: Creative Commons Attribution-NonCommercial-ShareAlike 3.0 Unported License.
////////////////////////////////////////////////////////////////////////////////
text : TheEmu = Experiments with Spinning - 00 - Description.txt
////////////////////////////////////////////////////////////////////////////////
clip {
id: ClipA
deny: table, cage, top, inout
nameGlowColor: 0, 1, 1
}
clip {
id: ClipB
deny: table, cage, top, inout
nameGlowColor: 0, 1, 1
}
////////////////////////////////////////////////////////////////////////////////
// No textures
////////////////////////////////////////////////////////////////////////////////
camera {
type: 3D
angle: 45
pos: 0, -540, 1180
target: 0, -540, 0
ambient: 0.2, 0.2, 0.2
// By nesting the two clipSprite nodes inside a third node
// their coordinates are relative to the enclosing node so
// when the enclosing node is rotated they rotate with it.
// A zero sized quad is most convenient for this purpose.
quad {
size: 0,0
pos: 0, -150, 20
animate: 10, loopforward, linear, rot, 0, 360, 0
quad {
pos: 0, -390, 0
rot: 0, 90, 0
size: 500, 800
color: 1, 0, 0
opacity: -10000
animate: 10, loopforward, linear, opacity, 20000
}
clipSprite {
source: ClipA
pos: 0, 0, 0
rot: 0, 90, 0
opacity: -10000
animate: 10, loopforward, linear, opacity, 20000
standingHeight: 700
resolution: 20
material: false
}
quad {
pos: 0, -390, 0
rot: 0, 90, 0
size: 500, 800
color: 0, 0, 1
opacity: 10000
animate: 10, loopforward, linear, opacity, -20000
}
clipSprite {
source: ClipB
pos: 0, 0, 0
rot: 0, -90, 0
opacity: 10000
animate: 10, loopforward, linear, opacity, -20000
standingHeight: 700
resolution: 20
material: false
}
}
// The performers names.
clipNameSprite {
source: ClipA
pos: 0, -150, 20
hotspot: 0.5, 0.5
}
clipNameSprite {
source: ClipB
pos: 0, -300, 20
hotspot: 0.5, 0.5
}
}
Z22
Mitglied seit in Aug 2017 1166 Beiträge
12. November 2017
k, tried that too. didn't fix the problem.
did notice that it's only when you output the second shader that the first gets added to it of its own accord.
So i just tried showing one or the other directly from the .scn and they come out clean so its when i send them both into the combine shader that it fucks up. Do i need multiple copies of vtexcords or something in there?
TheEmu
Mitglied seit in Jul 2012 3309 Beiträge
12. November 2017
@Z22 - I still do not know what it is that you think is a problem because I have no idea what you think the output should look like. I do not know what the output from either of the shaders is supposed to be so I can not tell if they are combined properly or not. It is even possible that its working properly on my system but going wrong on yours.
Can you please explain more clearly, preferably with pictures what you expect to see, what you actualy see and what is wrong with what you see.
Can you please explain more clearly, preferably with pictures what you expect to see, what you actualy see and what is wrong with what you see.
Z22
Mitglied seit in Aug 2017 1166 Beiträge
12. November 2017 (edited)
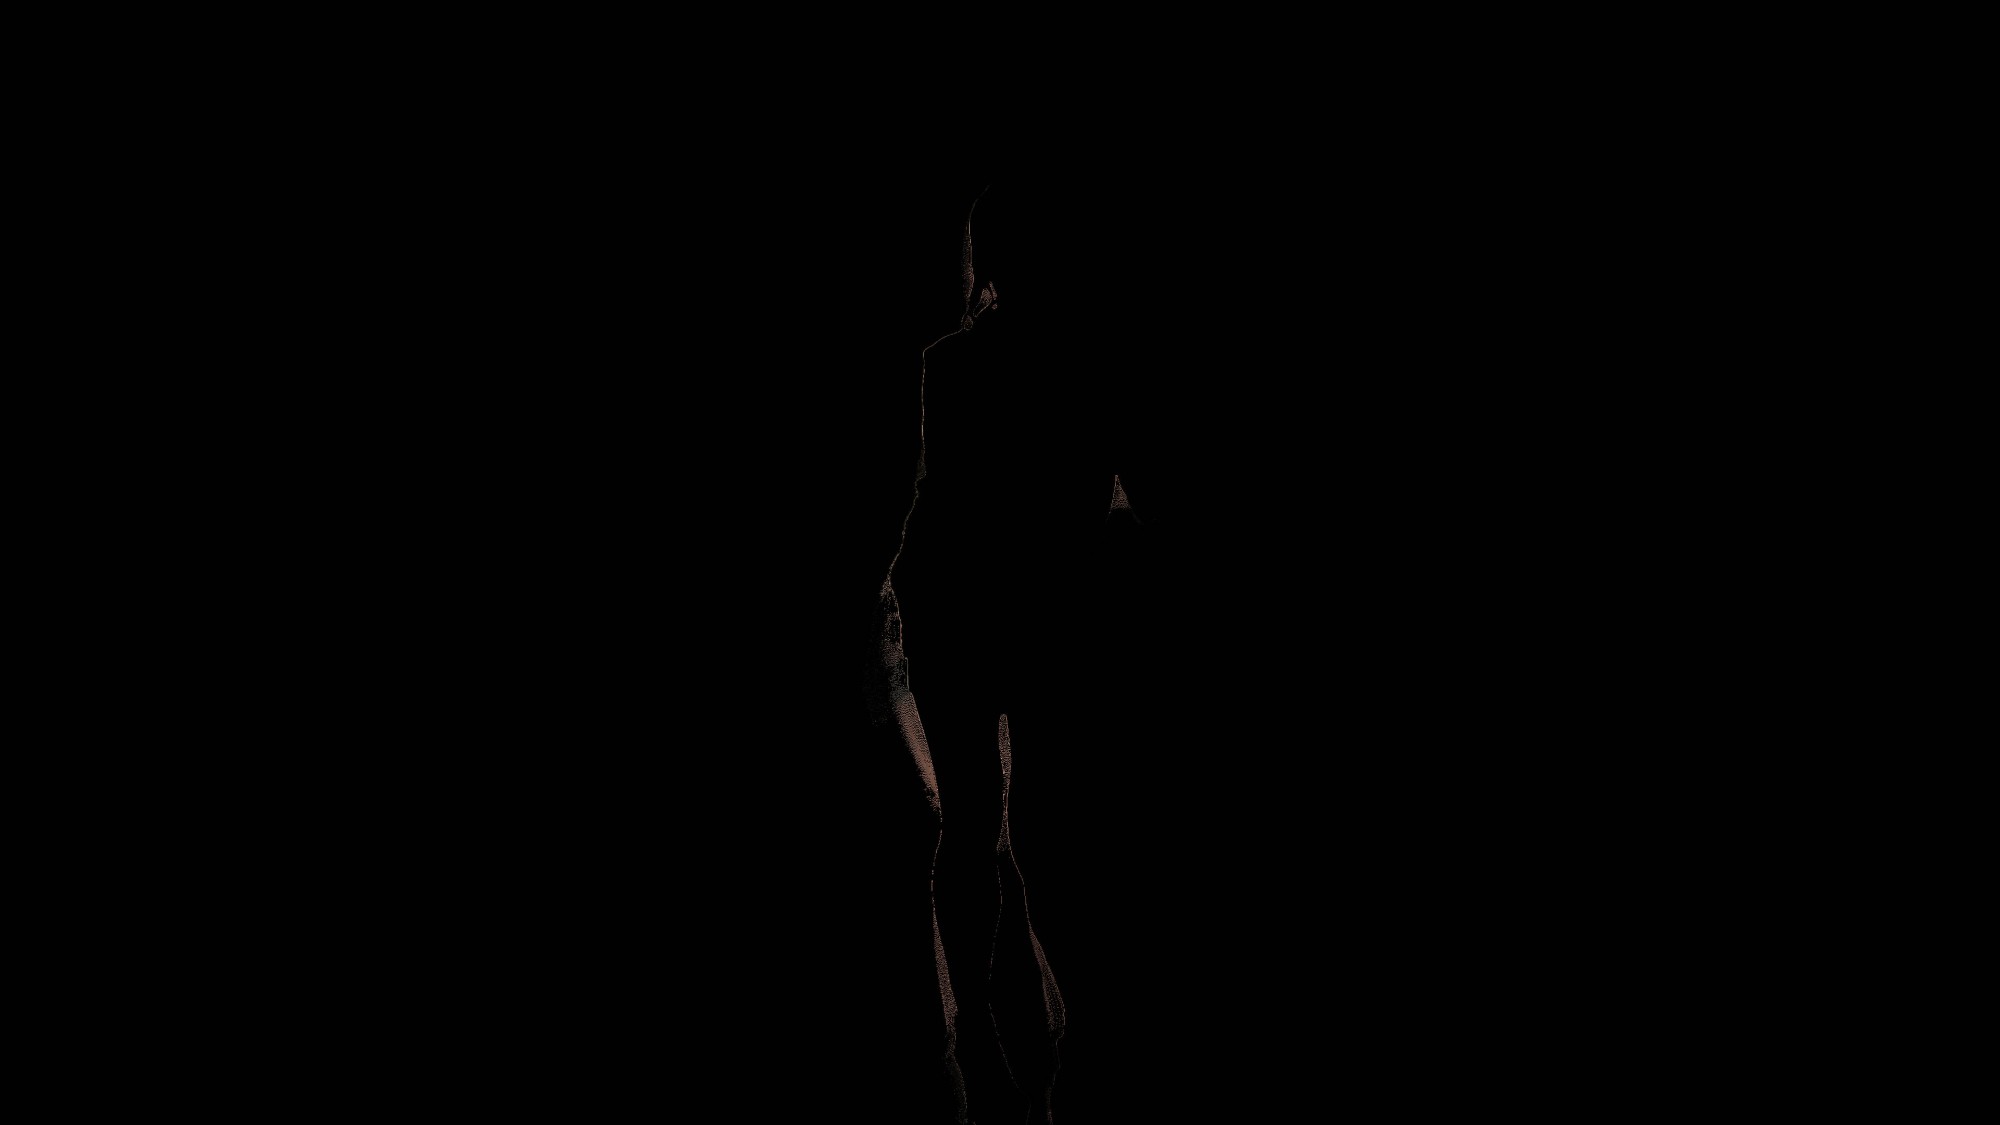
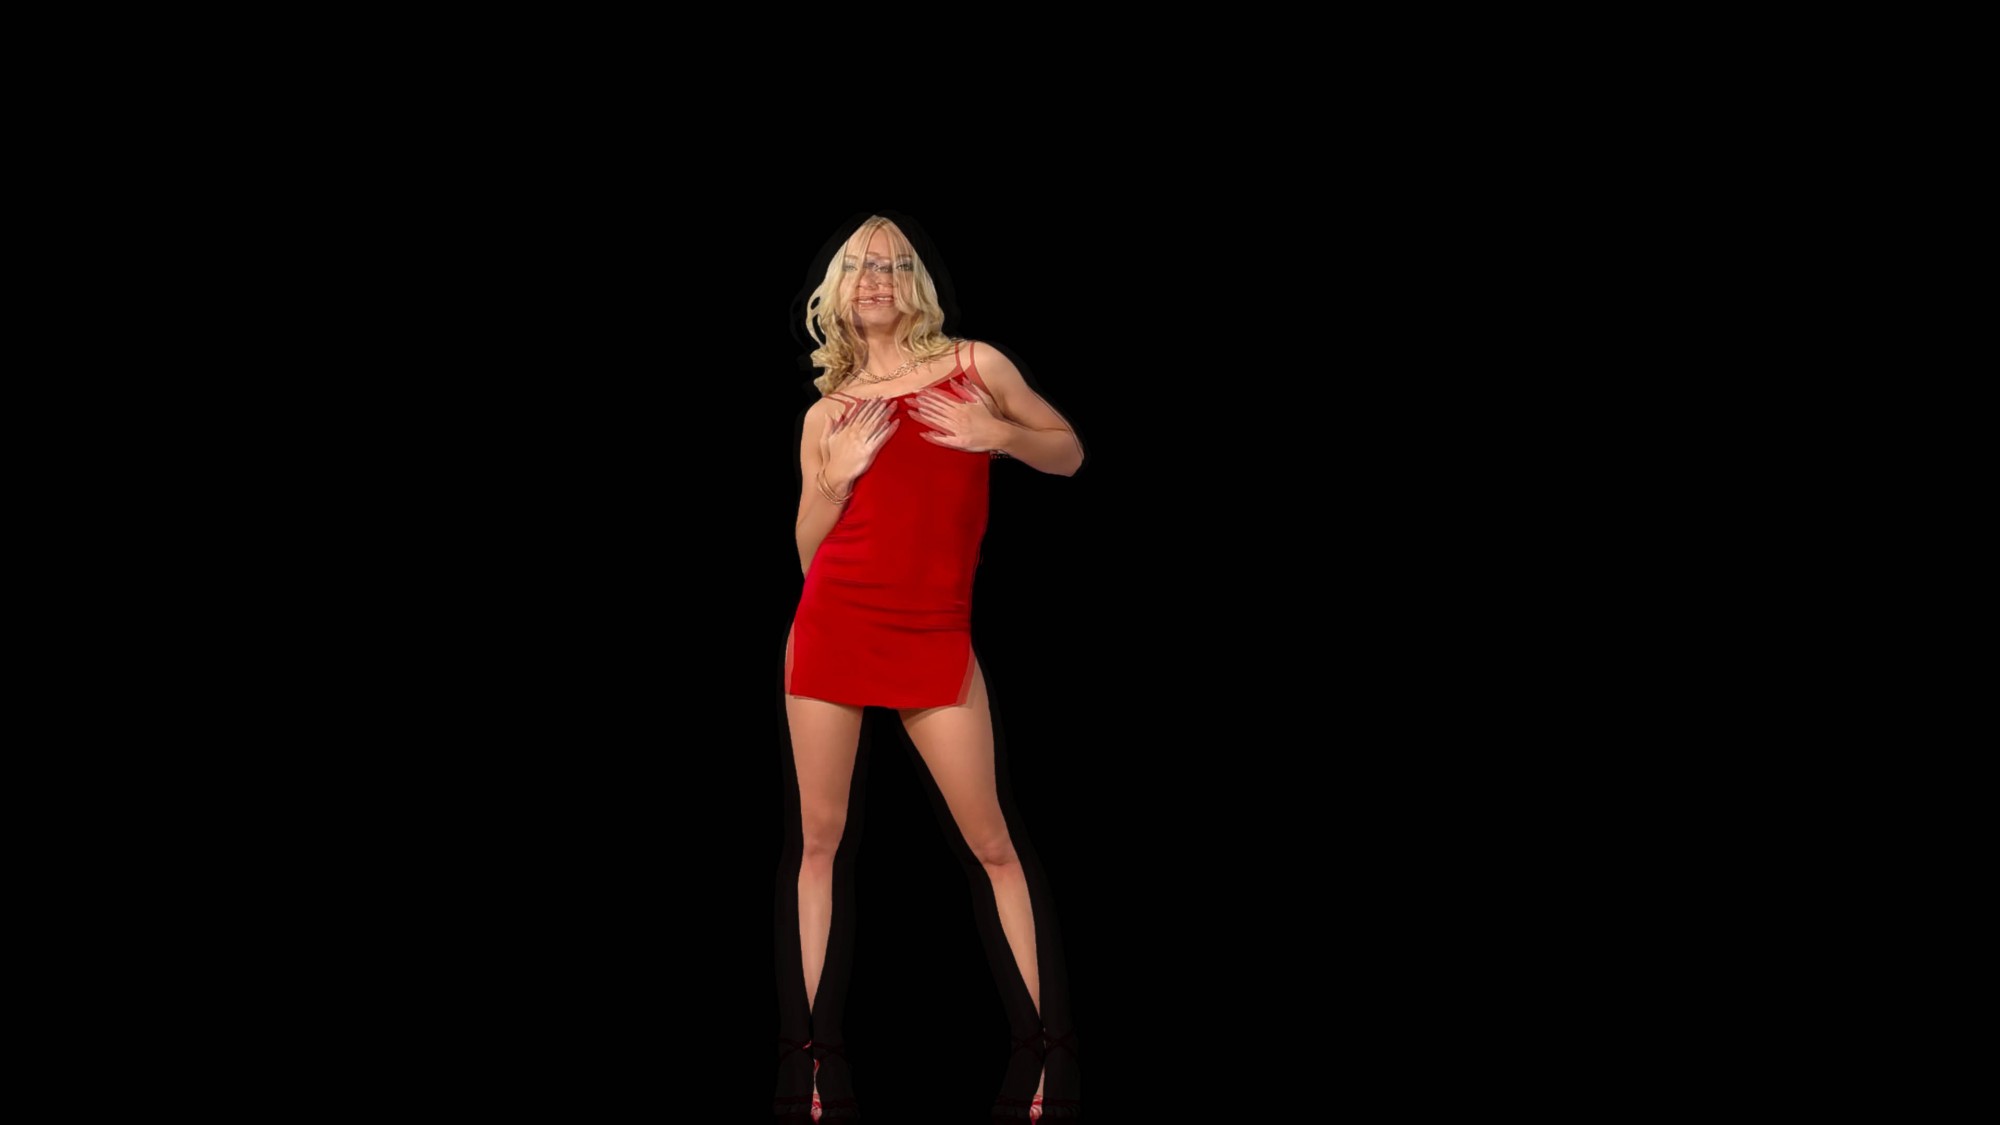
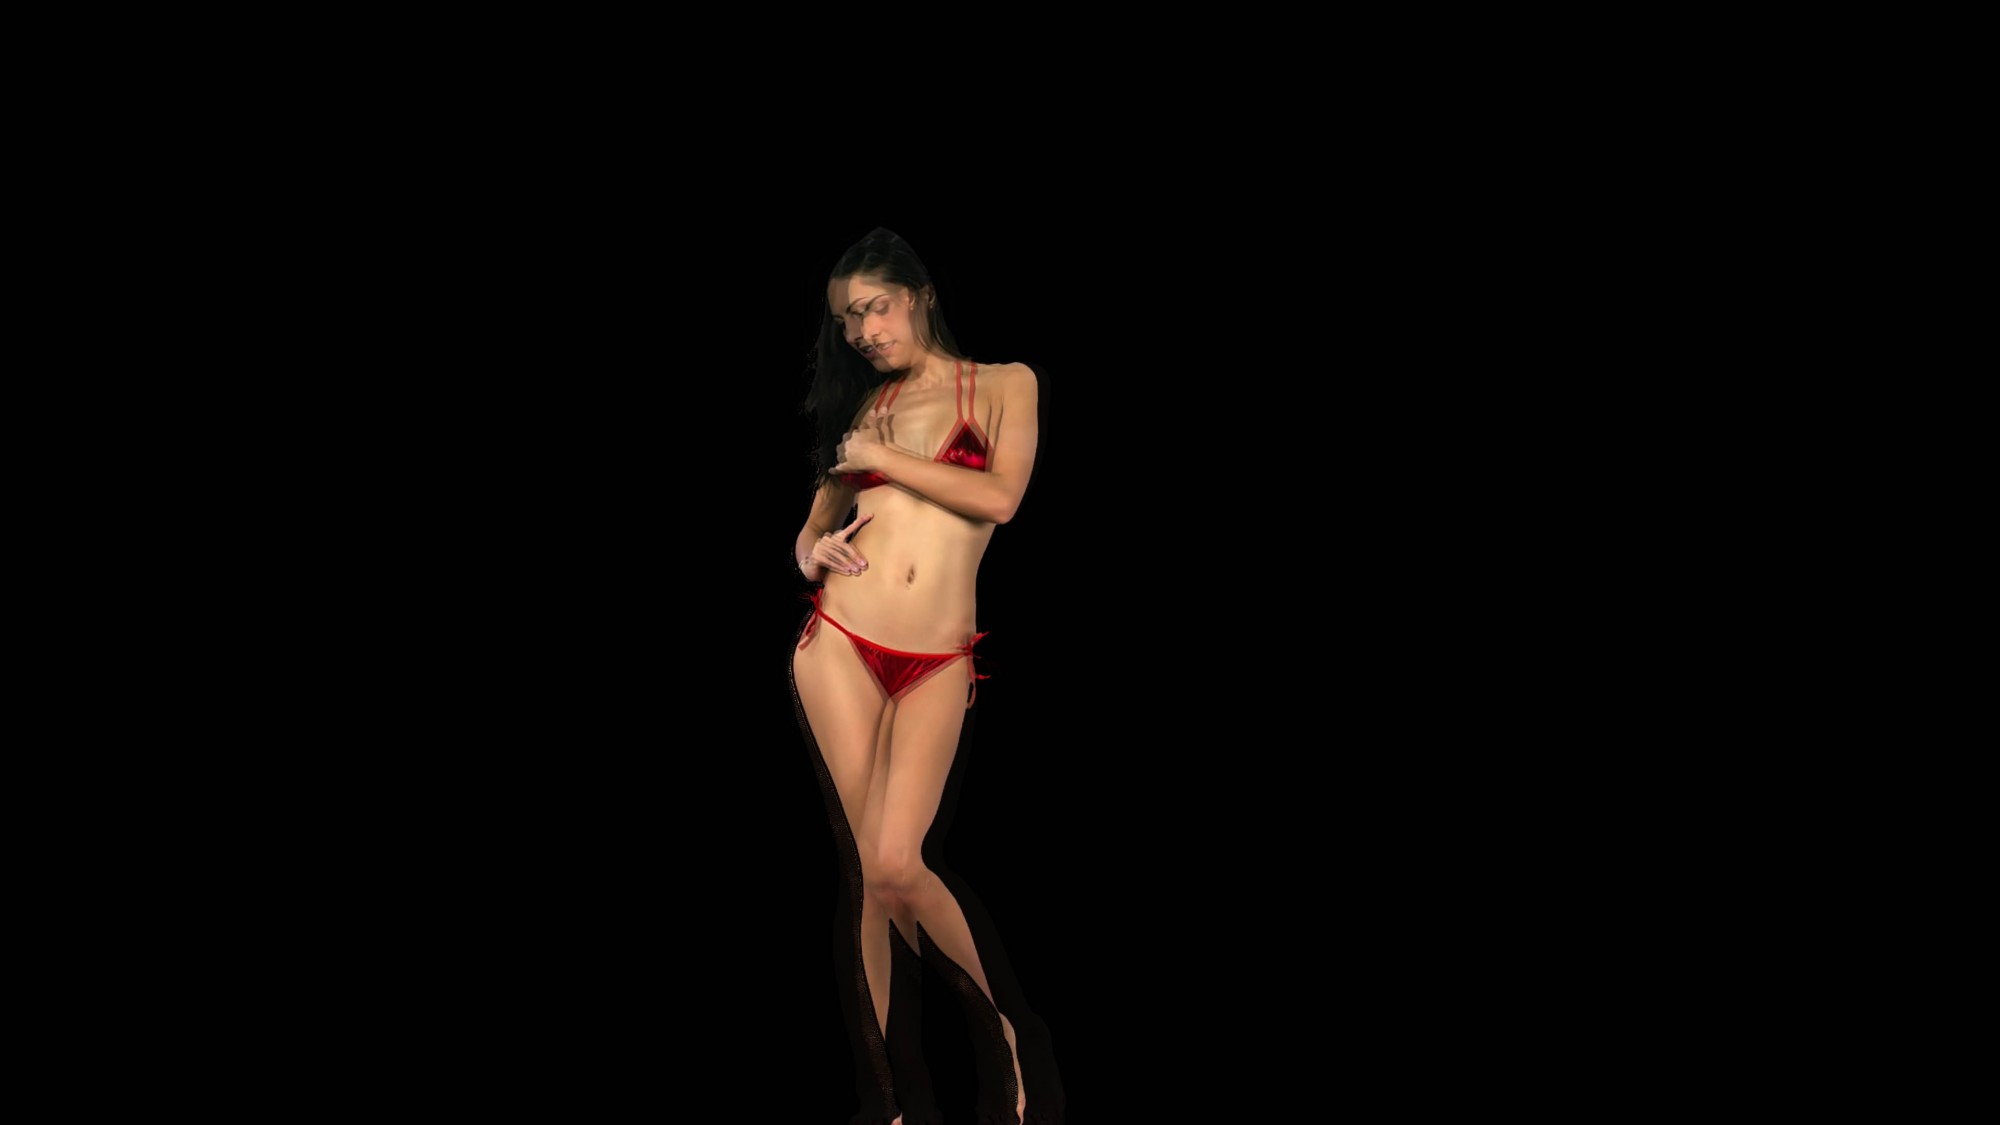
First picture is the dust shader output, second is the spin, third is what is coming out without actually combining them in the combine.fsh. I you look closely at her legs you can see the dust effect, it shouldn't be there as combine is outputting
gl_FragColor = Dust2;
//Which is the spin shader, i just didn't get round to renaming things because this .scn's only purpose it to illustrate the bug.
If i set combine to
gl_FragColor = Dust;
it does as expected and outputs just the dust shader.
If i set it to
gl_FragColor = Clip;
again, as expected. but if i use any shader not just the spin one(i only used that one here as its easy to tell the two effects appart) then it borks it and outputs a combination of the result of the shaders that use
clipSprite {
pos: 0, 1080
standingHeight: 1800
source: Clip
blend: true
}
Z22
Mitglied seit in Aug 2017 1166 Beiträge
12. November 2017 (edited)
Empty.psd
Which is a transparent texture. Can see the bug.
Empty.jpg White texture. Can't see the bug when dust2 is output but that could be just hiding it, dust is fucked because of all the white
Empty.jpg
black texture Can't see the bug when output dust2 but get a new bug when outputing dust.
Which is a transparent texture. Can see the bug.
Empty.jpg White texture. Can't see the bug when dust2 is output but that could be just hiding it, dust is fucked because of all the white
Empty.jpg
black texture Can't see the bug when output dust2 but get a new bug when outputing dust.
TheEmu
Mitglied seit in Jul 2012 3309 Beiträge
12. November 2017 (edited)
@Z22 - from your pictures I now understand what you were talking about. On my system the Dust shader produces a much thinner area of dust than the example you posted, so thin that it is almost unnotiable when combined with the output from spin. This explains why I could not understand what your problem was because the symptom was almost imperceptable on my system.
Z22
Mitglied seit in Aug 2017 1166 Beiträge
12. November 2017 (edited)
Yeh, most of the time it's just a thin layer, i got lucky with the screenshot i guess. But it shouldn't be there at all. I am hoping to narrow down the problem so i can make a bug report to totem so they can fix it. It may be related to the other one where a shader with 2 different input textures will output the second texture even though its not used anywhere in the shader.
It could be a gl bug from this version (qt 5.4.2.0). It looks like 5.4.2 isn't an supported version anymore from qt but its a version from digia plc.
https://doc.qt.io/
It could be a gl bug from this version (qt 5.4.2.0). It looks like 5.4.2 isn't an supported version anymore from qt but its a version from digia plc.
https://doc.qt.io/
Z22
Mitglied seit in Aug 2017 1166 Beiträge
12. November 2017
I keep calling it a bug but it could just be me.
TheEmu
Mitglied seit in Jul 2012 3309 Beiträge
12. November 2017
@Z22 - I have made some progess. The form of the output now seems to make sense, but is in the wrong place and has the wrong size. Along the way I tidied up both the Spin and the Dust shaders and added some debugging colouration to the .scn file. I will have to split this into two posts because it is getting too big for one.
For Dust.fsh I use
For Spin.fsh I use
I have renamed Combine.fsh to Combine-Dusty2a.fsh for which I use
uniform sampler2D texture0;
uniform sampler2D texture1;
uniform sampler2D texture2;
varying vec4 gl_TexCoord[];
void main(void)
{
vec4 Clip = texture2D(texture0, gl_TexCoord[0].xy);
vec4 Dust = texture2D(texture1, gl_TexCoord[0].xy);
vec4 Dust2 = texture2D(texture2, gl_TexCoord[0].xy);
gl_FragColor = mix ( Dust2, Dust, Clip.a ) * gl_Color;
// gl_FragColor = Clip; // Debugging options
// gl_FragColor = Dust; // Debugging options
// gl_FragColor = Dust2; // Debugging options
}
For Dust.fsh I use
uniform sampler2D texture0;
uniform float u_Elapsed;
vec2 vTexCoord = gl_TexCoord[0].xy;
///////////////////////////////////////////////////////////////////////////////////////////
vec2 Grain(vec2 fm0)
{
vec4 Girl = texture2D ( texture0, vTexCoord.xy ) ;
float Tits = ( Girl.r + Girl.g + Girl.b ) * 0.3333333333333;
fm0.x = (fm0.x)-0.03; // 0.00005; // Increased for debugging purposes
fm0.y = (fm0.y)-0.03; // 0.00005; // Increased for debugging purposes
float x = Tits * fm0.x ;
float y = Tits * fm0.y ;
return vec2 ( fm0.x+x, fm0.y-y );
}
///////////////////////////////////////////////////////////////////////////////////////////
void main(void)
{
gl_FragColor = texture2D ( texture0, Grain(vTexCoord) ) * gl_Color;
}
For Spin.fsh I use
// Main code adapted from https://www.shadertoy.com/view/XlsGWf by whiteskull
// Adapted by z22 and TheEmu.
uniform sampler2D texture0;
varying vec4 gl_TexCoord[];
varying vec4 gl_Color;
uniform vec2 u_WindowSize;
uniform float u_Elapsed;
void main()
{
// Get a time varying angle of rotation, a.
float sp = cos(u_Elapsed*0.5) * sin(u_Elapsed*0.5);
float a = radians(u_Elapsed*sp) * 0.2;
// Form the rotation matrix for a rotaion by angle a.
mat2 R = mat2 ( cos(a), -sin(a),
sin(a), cos(a)
);
// Rescale and shift origin, uv components in range -0.5 to +0.5
vec2 uv = gl_FragCoord.xy/u_WindowSize.xy - 0.5;
// Clockwise and anticlockwise rotations to uv.
vec2 uvA = R*uv;
vec2 uvB = uv*R;
// Look up colours at the rotated coordinates.
vec4 AA = texture2D ( texture0, uvA+0.5 );
vec4 BB = texture2D ( texture0, uvB+0.5 );
// Combine colour samples weighted by their opacities.
vec3 color = AA.rgb*AA.a + BB.rgb*BB.a;
// Determine what opacity to use. There is no obvious
// choice, but the following should work well for most
// cases. It works perfectly when the source opacities
// are either 0.0 or 1.0 and gives sensible results if
// thhey have intermediate values of opacity.
float opacity = clamp ( AA.a+BB.a, 0.0, 1.0 );
// Update the shader's output.
gl_FragColor = vec4(color,opacity) * gl_Color;
}
I have renamed Combine.fsh to Combine-Dusty2a.fsh for which I use
uniform sampler2D texture0;
uniform sampler2D texture1;
uniform sampler2D texture2;
varying vec4 gl_TexCoord[];
void main(void)
{
vec4 Clip = texture2D(texture0, gl_TexCoord[0].xy);
vec4 Dust = texture2D(texture1, gl_TexCoord[0].xy);
vec4 Dust2 = texture2D(texture2, gl_TexCoord[0].xy);
gl_FragColor = mix ( Dust2, Dust, Clip.a ) * gl_Color;
// gl_FragColor = Clip; // Debugging options
// gl_FragColor = Dust; // Debugging options
// gl_FragColor = Dust2; // Debugging options
}
TheEmu
Mitglied seit in Jul 2012 3309 Beiträge
12. November 2017
@Z22 - second part of post
For the .scn file I use the following. I have used color: clauses to tint the outputs of the Dust and Spin shaders red and green respectively, with blue being used for the inputs from the FeedbackBuffers.
The importnat change that got things looking consistantwas to change the order of the sources to the Combine shader (with a matching change in the shader itself). I have no idea why this was necessary, nor why the output is now sized differently and in a different place on the screen. I suggest you first look at the inputs being fed into the Combine shader by following the comments towards the end of the .scn file, and then look at the individual inputs it sees by feeding all three inputs to it and seeing what comes out when you change the output from that shader to be just one of its inputs. The colouration makes it clear where everything came from and whether there is any cross contamination. With the sources just posted I see no contamination and the outputs at last make some sort of sense.
clip {
id: Clip
deny: table, behindtable, fronttable, inout, cage, top
}
////////////////////////////////////////////////////////////////////////////////
texture {
id: Feedback
source: Empty.psd
// Empty source
}
texture {
id: Feedback2
source: Empty2.psd
// Empty source
}
////////////////////////////////////////////////////////////////////////////////
framebuffer
{
id: FeedbackBuffer
pos: 1920, 1080
size: 3840, 2160
sprite {
opacity: 1
hotspot: 0.5, 0.499
size: 3840, 2160
source: Feedback
color : 0.5, 0.5, 1.0 // Debug - using blue to mark stuff from a "Feedback" buffer
blend: false
}
}
framebuffer
{
id: FeedbackBuffer2
pos: 1920, 1080
size: 3840, 2160
sprite {
opacity: 1
scale: 1.01, 1.01
//hotspot: 0.5, 0.5
size: 3840, 2160
source: Feedback2
color : 0.5, 0.5, 1.0 // Debug - using blue to mark stuff from a "Feedback" buffer
blend: false
}
}
framebuffer
{
id: fb2
pos: 1920, 1080
size: 3840, 2160
clipSprite {
source: FeedbackBuffer
blend: true
}
clipSprite {
pos: 0, 1080
standingHeight: 1800
source: Clip
blend: true
}
}
framebuffer
{
id: fb3
pos: 1920, 1080
size: 3840, 2160
clipSprite {
source: FeedbackBuffer2
blend: true
}
clipSprite {
pos: 0, 1080
standingHeight: 1800
source: Clip
blend: true
}
}
////////////////////////////////////////////////////////////////////////////////
framebuffer
{
id: Dust
source: fb2
shader: fragment, Dust.fsh
color: 1.0, 0.5, 0.5 // Debug - anything from Dust is redish
}
framebuffer
{
id: Dust2
source: fb3
shader: fragment, spin.fsh
color: 0.5, 1.0, 0.5 // Debug - anything from Dust2 is greenish
}
////////////////////////////////////////////////////////////////////////////////
camera {
type : 2D
pos : 1920, 1080
size : 3840, 2160
sprite {
size: 3840, 2160
// For debugging use one of these simple sources to see
// what each input to the shader would be by itself.
// source: Dust
// source: Dust2
// source: Clip
// and comment out the rest, including the shader line.
source: Clip, 0
source: Dust, 1
source: Dust2, 2
shader: Combine-Dusty2a.fsh
}
}
Z22
Mitglied seit in Aug 2017 1166 Beiträge
13. November 2017 (edited)
I previously tried tinting the fb's but it didn't work for some reason at the time, it works now?
Realised where i went wrong with that, i added the colour to the feedbackbuffer, should hav added it to the shader as you have done.
Realised where i went wrong with that, i added the colour to the feedbackbuffer, should hav added it to the shader as you have done.
Z22
Mitglied seit in Aug 2017 1166 Beiträge
13. November 2017
Any luck figuring out the cause?
Noch keine Teilnahmeberechtigung
Als ein Gratisnutzer von iStripper bist du nicht berechtigt Beiträge zu schreiben oder neue Topics zu starten.
Aber du hast Zugriff auf die grundlegenden Bereiche und kannst unsere Community kennen lernen