0
Discussions for Scenes for Version 1.2.X Fullscreen Mode here Forum / Everything about iStripper
x26638184
Joined in Oct 2018 189 post(s)
July 29, 2020
@Z22: In general everything is with sprite do not use quad.
Z22
Joined in Aug 2017 1166 post(s)
July 29, 2020
It looks like it's not sorting the depth according to the camera view but is doing it according to the sprite order in the scn as one wall is perfectly fine while 2 have the error. Using quads might fix it... might.
x26638184
Joined in Oct 2018 189 post(s)
July 29, 2020
@Z22:
Calmly reviewing the dummy test and seeing 1:33. The chain of failure is very rare, it is like it renders everything on the same superimposed plane, I think that some property or attribute of some type that according to the camera rotation shows or does not show certain elements must be missing. this to write a book already. The strange case of overlapping objects in iStripper.😂 .
On the web this happens when you accidentally activate the "overlap" option.
The healthiest maybe is to assemble this in Blender or Cinema 4D, I take advantage of learning and have a better understanding of the problem.
I found a lot of solution in 2D scenes assembling in external software (adobe illustrator) where you can run in a more controlled environment.
Calmly reviewing the dummy test and seeing 1:33. The chain of failure is very rare, it is like it renders everything on the same superimposed plane, I think that some property or attribute of some type that according to the camera rotation shows or does not show certain elements must be missing. this to write a book already. The strange case of overlapping objects in iStripper.
On the web this happens when you accidentally activate the "overlap" option.
The healthiest maybe is to assemble this in Blender or Cinema 4D, I take advantage of learning and have a better understanding of the problem.
I found a lot of solution in 2D scenes assembling in external software (adobe illustrator) where you can run in a more controlled environment.
x26638184
Joined in Oct 2018 189 post(s)
July 29, 2020
Add 360 rotation line in - Whisper Club (Multi Girls) .scn-, exactly the same thing happens
camera
{
type: 3D
angle: 45 // Vertical field of view in degrees within a window.
pos: -80, -560, 1180 // Camera (Eye) position x, y, z.
target: -40, -560, 0 // Camera target position.
ambient: 0.8, 0.8, 0.8 // Ambient color (RGB) for nodes with material.
animate: 40, PingPong, InOutSine, target, 80, 0, 0
animate: 40, PingPong, InOutSine, pos, 160, 0, 0
animate: 20, PingPong, InOutSine, pos, 0, 0, 120
animate: 60, loopforward, InOutSine, rot, 0, 360, 0 //<------------
TheEmu
Joined in Jul 2012 3309 post(s)
July 30, 2020 (edited)
It looks like it's not sorting the depth according to the camera view but is doing it according to the sprite order in the scn as one wall is perfectly fine while 2 have the error.
The elements in a scene are rendered as if
1) each is drawn on its own layer of transparent film
2) these layers are then stacked in the order in which they appear in the .scn file
the first step takes the distance from the camera into account. The second does not, If you don't account for this in a.scn file the results can, and often do, look very odd - especially if you are moving things about in a scene by animating their positions or they are rotated about X or Y. If complex movement is involved then it is often necessary to duplicate elements and animate their opacities such that only the right one is visible at any time.
As an aside, I think the GLSL fragment shader language provides a way to change the Z buffer value of a pixel which could form the basis of correcting the ordering so that it is based on position in 3D space, but I have not investigated it yet. It is on a long list of things I hope look at.
The finish of this really surprises me every day (I never imagined that the software will endure something so complex). Visually playing with perspectives and other gadgets, it makes the software very entertaining and with good hardware it is really a delight.
I also find it surprising just what can be accomplished using just the functionality provided by the .scn files even without resorting to either fragment shaders (the .fsh fils) or vertex shaders (there are a few scenes around that use these to distort the geometry).
I first got hooked by scenes when I created my "experiments with carousels" which I treated a kind of puzzle to see how far I could push the capabilities of the .scn files - then I discovered the fun of shaders.
However, it has to be admitted that doing anything complicated involves a lot of often very tedious work. I have quite a few ideas that could lessen that - for example the use of macros I mentioned a few posts back, some built in arithmetic capability and the ability to direcly specify the sorting order for sprites rather than having it simply be the order in which they are defined. One day I may get those ideas into a coherent form and post them here.
EverthangForever
Joined in Oct 2009 2584 post(s)
July 30, 2020 (edited)
@TheEmu
I consider this to be the first stumbling block for anyone trying to incorporate .scn parameters into a scene when using shaders in this platform. The apparent loss of functionality..It is like we need a 'universal shader' which can be applied in a subsequent framebuffer over the top of what a selected shader does. Something like what we do now to overcome the inherent sampler texture inversion nuisance whenever a shader is used in this platform. I would imagine whats required is a series of known uniforms written into an existing 'null' shader which can by framebuffer over-ride and reinstate those 'lost' .scn parameters.
Anything you specify via the color: and opacity: clauses in a node in the .scn file are passed to the shader via the gl_Color vector. If you use a shader it is up to the shader itself to use these values they are not applied automatically as they are if you do not use a shader (in reality there is a default shader that uses them and if you supply your own shader then that replaces the default shader and if you need some of the things done by the default shader then you have to do it yourself)
I consider this to be the first stumbling block for anyone trying to incorporate .scn parameters into a scene when using shaders in this platform. The apparent loss of functionality..It is like we need a 'universal shader' which can be applied in a subsequent framebuffer over the top of what a selected shader does. Something like what we do now to overcome the inherent sampler texture inversion nuisance whenever a shader is used in this platform. I would imagine whats required is a series of known uniforms written into an existing 'null' shader which can by framebuffer over-ride and reinstate those 'lost' .scn parameters.
TheEmu
Joined in Jul 2012 3309 post(s)
July 30, 2020 (edited)
@EverthangForever
There is the "series of known uniforms" you are talking about. They are the four components of gl_Color
color: sets gl_Color.rgb
opacity: sets gl_Color.a
which take default values of 1.0.
The default shader is something similar to my TheEmuLib.Emu_Null.fsh except for ClipNameSprite nodes which use a different one that fades in and out its source texture.
EverthangForever
Joined in Oct 2009 2584 post(s)
July 30, 2020
a series of known uniforms written into an existing 'null' shader which can by framebuffer over-ride and reinstate those 'lost' .scn parameters.screw that...I meant to say
"..an advanced version of the platform incorporating MANY default shaders dedicated to scene parameters which are called by new syntax directly in the .scn file."
To monetize..could maybe offer the new platform a plug-in. Call it an 'easy iScene editor'
for annual sub or obtained in other ways,gambling,loyalty etc..whatever
Outrageous, but worth a thought.
Z22
Joined in Aug 2017 1166 post(s)
July 30, 2020 (edited)
I think someone tried that a while back, they made a scene editor in unity. I never tried it so don't know it's capabilities.
Edit: found it first try...
Edit: found it first try...
https://www.istripper.com/forum/thread/39874/1?post=586649
Everything about iStripper / Visual Fullscreen Scene Creator Using Unity
While I'm a fairly experienced programmer, I found creating fullscreen scenes to be too tedious, especially without documentation. So I started working on a visual way of creating scenes using Unity....
EverthangForever
Joined in Oct 2009 2584 post(s)
August 2, 2020
3rd Aug
I believe that Totem should reprocess some cards' clips
so that the model remains more center of screen.
Quite a few models spend a great deal of time
doing floor work while in freestanding clips, however this limits the scale
of their usual presentation. To illustrate why centering is so important,
and to provide a way of enjoying larger rendered standing clips
up close, the following scene demonstrates an approach.
Zip size = 14.4 Kb
https://scenes.virtuastripper.net/ET_FractalGarden76.zip
Extract to ..scenes/ folder. Allow merged folders and to overwrite existing files.
TheEmu
Joined in Jul 2012 3309 post(s)
August 9, 2020 (edited)
@sh42n81
In the fullscreen sharing thread there has been some discussions about your recent scenes and the effect of "zooming".
The difficulties arise because you are moving the camera in and out relative to the both th performers and the other screen elements, consequently those that have been placed closer to the camera are more affected than those further away which can often result in unrealistic apparent changes in the relative sizes of the objects in the scene.
In principle this problem can be overcome by properly placing the various objects in the scene at their proper positions in 3D space - but this is not as easy as it sounds if all you are working with is a series of 2D "flats" some of which may conatin images of objects that themselves should be at different distances from the camera and which in any case will often contain images of surfaces that are not perpendicular to the line of slight - e.g. the floor.
However, if you use a true zoom by animating the camera's field of view rather than moving the camera in and out (which is not a "zoom" but a "track in/out") then it is rather easier to get things to look right.
Use something like
animate: 45, Backward, InOutSine, angle, 15.0 // adjust the value to get the effect you want
in place of animating the camera's position and target. You then should not need to compensate for the camera movement in the clipsprites.
A ***** comment about your club scenes. I think that these would look better if you included reflections of the performers in the dance floors. These are easier to get to look right than are shadows as you do not need to angle them to match other shadows - just use a flipped parially transparent copy of the clipsprite. You do, however, need to use a forground mask to cut them off at the edges of the floor or any railings that are there. t is slightly more difficult for table clips as you then need to use a mask to prevent "reflections" of legs appearing above the floor.
TheEmu
Joined in Jul 2012 3309 post(s)
August 9, 2020
The real zoom frustration for me is that I can't figure out if it's possible to set multiple zoom effects to run in sequence. What I really wanted to do with "Ruination 1" was to zoom in on one model for 10 - 20 seconds, then pull back, swing the target to the next model, zoom in on her for 10 - 20 seconds, and repeat for the third model. Kind of like the Game of Thrones opener. As far as I can tell, this can't be done--at least, not with the techniques that I have learned thusfar.
That can be done. You have to nest a series of movements within each other arranging for them to sum to the overall movement that you want. You use a sort of Fourier synthesis to add cyclic motions at various frequencies.
There are many examples of this in my "Houses" scenes where I zoom in (or rather track in) onto a series of windows scanning from one window to the next pausing at each in turn and zooming in.
http://www.theemusnest.eu/scenes/Zips/TheEmusHouses.zip
which is an 80MB download.
There are a lot of examples of using this technique in the "Detailed Scan" versions in that set of scenes, Perhaps the simplest to understand are the Irish Bookshop scenes so I would start there and when you understand that try looking at some of the more complex scenes where the scanning is in two dimensions.
sh42n81
Joined in Apr 2008 314 post(s)
August 9, 2020
@TheEmu
That's great feedback, thank you!
That's great feedback, thank you!
EverthangForever
Joined in Oct 2009 2584 post(s)
August 9, 2020
Aug 10th: ET - FG077 Bare EleganceMod01.scn
The usual buggy thangs became apparent when remixing
Bare Elegance for a more closer view..
1. The floor lights shader did not like zooming in and out
& had to be ommitted because like other shaders, its screen
location is fixed at initiation, for the duration of the .fsh
2. Correcting left-right model orientation meant the
stage entries all then enter from the non-stairs side.
Could not reverse the backgnd because was full of signs :-/
3. Shadow alignments vary according to the age of the clip
especially when model spends much time in front of the pole.
https://scenes.virtuastripper.net/ET_FractalGarden77.zip
zip size = 4.82 MB
Carstrip
Joined in Apr 2020 219 post(s)
August 10, 2020
Interesting mod ET 👍 I like it, makes that scene more alive.
I did have a quick look at reversing the background so you can fix the entry exit issue but the "Heaven" sign does needs photoshop :/ ***** it when the writing on the girls clothing is backwards!, all the other signs can be reversed tho, maybe I can just blend out the heaven sign.
The camera actions on each sprite is interesting too, very clean animation, you've definitely been playing with fullscreen for a long time, very nicely done, thanks for sharing.
EverthangForever
Joined in Oct 2009 2584 post(s)
August 10, 2020 (edited)
Good on you @Carstrip. Maybe could just cut out the stage railing/stairs and reverse em, lol.
Anyhow, as with all my experiments, anything helpful leading to better outcomes for others work
is key to what makes good here..(like say deploying a gaussian blur on zoomed cutouts edges etc.)
Mod was remixed to America - Greatest Hits. Thanks & rock on pal :-)
Anyhow, as with all my experiments, anything helpful leading to better outcomes for others work
is key to what makes good here..(like say deploying a gaussian blur on zoomed cutouts edges etc.)
Mod was remixed to America - Greatest Hits. Thanks & rock on pal :-)
TheEmu
Joined in Jul 2012 3309 post(s)
August 12, 2020 (edited)
@sh42n81
To avoid the problem shown in @JayZ971 's post just add
deny: inout
to the filter controls on the clip, or just add inout to the list if you already have a deny clause. This also helps to prevent, or at least greatly reduce, cases where a performer walks off a platform.
Unfortunately it does not distinguish between "old style" in-out clips where the main performance is centre stage but either walks on from the edge of the stage first or walks of afterwards from the "new style" in-out clips where the whole performance is at the edge of the screen. This is a pity but Totem do not provide us a way to distinguish between these two types of clips in scene description files. I very often want to work with just the one style of in-out clip but there is no way to do so. I hope that someday Totem will provide us with separate inoutEdge and inoutCentre specfiers.
sh42n81
Joined in Apr 2008 314 post(s)
August 12, 2020
@JayZ971 @TheEmu
Thank you for the feedback. I do appreciate it. Yeah, I don't love that, but I made the choice to leave the inouts in because I don't like limiting the number of clips that will play more than necessary. To me, it's just something I have to accept, like older cards cutting off at the knees on the fronttable clips or some girls using up way too much lateral space in their shows and walking on air in my scenes.
I have no quarrel with anyone who wants to modify the scenes I post to change things how they would like them better, though. Feel free to deny inouts on your end and even re-share them if you think others would appreciate the improvement. I'm not proud.😊
Thank you for the feedback. I do appreciate it. Yeah, I don't love that, but I made the choice to leave the inouts in because I don't like limiting the number of clips that will play more than necessary. To me, it's just something I have to accept, like older cards cutting off at the knees on the fronttable clips or some girls using up way too much lateral space in their shows and walking on air in my scenes.
I have no quarrel with anyone who wants to modify the scenes I post to change things how they would like them better, though. Feel free to deny inouts on your end and even re-share them if you think others would appreciate the improvement. I'm not proud.
EverthangForever
Joined in Oct 2009 2584 post(s)
August 12, 2020 (edited)
@TheEmu
I never understood Totem's logic in introducing the physical chroma-key edge screen causing us to deny working permissions on many many older cards perfectly good 'in/out' clips in fullscreen during 2017 onwards. Surely if they wanted to designate a model half hidden at the screen side they could have retained the simple placement method without excluding portion of the images in their actual clipsprite capture.
In late 2017 I cobbled an experiment snow scene for @Sexybrune which showed the consistant placement of the new in/out clipsprite can never occur on a scene because the size of the clip's bounding box will vary for each clip.
Totem's choice seemed at the time so low tech an approach. Anyway, an effect intended solely for the desktop crowd, to this day ~ it still beats me why they could not have replaced with a flag a tad less important in their clip names codes instead,.. like say using the 'holding a sign' or some other bit set .
August 12, 2020 (edited)
I very often want to work with just the one style of in-out clip but there is no way to do so.
For the Older clips that were misLabeld as In/Out
you can rename the clips, by removing the value of In/out from the clip type.
These are the clips where the Performer was hidden behind the table, and then popups up from behind.
Early on, they were classified as In/Out because the Performer enters from being off the screen.
But the True In/out clips are the Ones the Enter from the Side of the screen.
In/Out has a Value of 64, so from the Clip type number, subtract 64
After you Have renamed them, do a rebuild Collection.
These renamed Clips will no longer be Filtered out as in/Out clips.
But you won't be able to Include them specifically, since they are then, no longer a unique clip type.
August 12, 2020
they could have retained the simple placement method without excluding portion of the images in their actual clipsprite capture.
To achieve the desired effect ( the Model peaking in from the side of the Screen ) A real screen on the side of the stage was used.
This then allowed for an Accurate Bounding Box, that the software could then Shift to the Side of a Users Screen.
It then didn't matter the Size of the Performer, or the Outfit, or an Accessory.
The Edge of the Bounding box would always be the same.
Math
Find center of screen
Find edge of users Screen
Width to edge = Edge - Center
Find center of clip
Find edge of Bounding Box
Width of clip = Edge of Bounding box to Center
Clip center = Screen Center
Shift Clip from center = Width to Edge - Width of Clip
That places the Clip right on the side of the screen.
It is the Same type of Shift Used to Have the Clip Seem to be On the top of your Task Bar.
It would have been technically impossible to do the same if the Full body was included.
There would have been no Fixed Bounding Box.
An example is when the Model wraps her fingers around the edge of the screen.
That is only possible to create, because there is an Actual bounding box.
Bit 6 or a Value of 64, is what the Software uses to classify a clip as in/out.
After that Bit is found, then the Header of the clip contains the bounding box metrics to determine the shift amount.
Carstrip
Joined in Apr 2020 219 post(s)
August 12, 2020
I'm just curious @Wyldanimal. I did some testing and there is no consistancy with inout in fullscreen mode.
Do the swing clips use a similar calculation / programming to attach to the top of the users screen in desktop mode? Swing clips can be positioned and calculated in Y in fullscreen, cant the inout clips be calculated in x? or is it a filming restraint rather than the programming?
Do the swing clips use a similar calculation / programming to attach to the top of the users screen in desktop mode? Swing clips can be positioned and calculated in Y in fullscreen, cant the inout clips be calculated in x? or is it a filming restraint rather than the programming?
EverthangForever
Joined in Oct 2009 2584 post(s)
August 12, 2020 (edited)
These renamed Clips will no longer be Filtered out as in/Out clips. But you won't be able to Include them specifically, since they are then, no longer a unique clip type.
This whittling down of permissions control is actually a big deal for some scenes where you may want to allow a model to walk in or out of a scene as @Carstrip and I encountered in the Bare Elegance mod exercise.
TheEmu
Joined in Jul 2012 3309 post(s)
August 12, 2020 (edited)
For the Older clips that were misLabeld as In/Out
The older clips were not mislabelled as "inout". In my opinion it is the newer clips that are mislabelled and should preferably have been assigned a different clip type such as "edge" (just as the swing clips introduced at the same time are tagged as "top"). In any case the fact is that two very different clip types are classed as "inout" with no way to distinguish between them in a .scn file.
When I did some experimenting I found that the old style "inout" clips could be handled consistently in a scene. This is most easily seen with inout pole clips where the clips' hotspots are consistently, as one would expect, at the base of the pole (just as they are in normal pole clips). However, much to my surprise, I could find was no such consistency in hotspot placement for new style inout clips and it was not possible to accurately position these in a scene. These experiments were made quite some time ago so there may be more consistency now, but I doubt it.
EverthangForever
Joined in Oct 2009 2584 post(s)
August 12, 2020 (edited)
Imho, a scene file header needs to be implementable according to clip date. One that then differentiates how 'in/out' is to be treated. Its no good expecting members to deny perfectly good old in/out clips or edit the names of all their pre 2018 clips
TheEmu
Joined in Jul 2012 3309 post(s)
August 12, 2020 (edited)
@EverthangForever
I agree. In my opinion the new style inout clips should have been assigned a new flag bit rather than sharing one with the old style and the clips hotspots should have been defined such that they corresponded with the the edge of screen. This would have allowed us to accurately position these clips in, for example, a doorway. I was very surprised that this was not the case. The information to accurately position these clips is there somewhere (otherwise they would not work in desktop mode) but it is not available to fullscreen scene writers.
I agree. In my opinion the new style inout clips should have been assigned a new flag bit rather than sharing one with the old style and the clips hotspots should have been defined such that they corresponded with the the edge of screen. This would have allowed us to accurately position these clips in, for example, a doorway. I was very surprised that this was not the case. The information to accurately position these clips is there somewhere (otherwise they would not work in desktop mode) but it is not available to fullscreen scene writers.
EverthangForever
Joined in Oct 2009 2584 post(s)
August 12, 2020 (edited)
@TheEmu & all
I think it is more like someone is telling the boss..
'..we cannot get the models to act like they are behind a screen that isn't there'
Ok, well how about ditching the C-K screen and instead stretch a fine piano wire from roof to floor where it was. Models should be able to imagine a screen edge to work with, desktoppers have a fixed side reference and fullscreeners like @JayZ971 & the rest of us can get on with their full body clips back.. n'est-ce pas ?
August 12, 2020 (edited)
I'm just curious @Wyldanimal. I did some testing and there is no consistancy with inout in fullscreen mode.
Do the swing clips use a similar calculation / programming to attach to the top of the users screen in desktop mode? Swing clips can be positioned and calculated in Y in fullscreen, cant the inout clips be calculated in x? or is it a filming restraint rather than the programming?
All Swing Clips share a Common Hot spot that is the Top Center of the clip.
that is the Attachment Point.
It is In Y axis
in fact All of the Clips that have a Y axis Hotspot, can be consistently coded for in a Scene.
In Out clips do not have a consistent X axis hot spot.
It varies from clip to clip.
Full Screen dosn't make any calculation for In/out clip shifting.
In desktop mode.
the Software Sets an Entrance Point.
All of the small size Clips are Located on the Screen based off this entrance point.
In/Out clips are a special case.
the Entrance point Y axis is only used, and the X position is ignored.
instead An X location based on the edge of the users screen is calculated.
And the Clip is shifted to this new X location.
This is not Done in Full Screen Scenes.
In desktop mode
The Saved Entrance Spot is the Center of the Circle
often the Entrance and the Clip Hotspot will be the same.
but the Hot spot can be shifted, depending on what type of clip it is.
The Entrance Remains in the same spot, it does not get shifted.
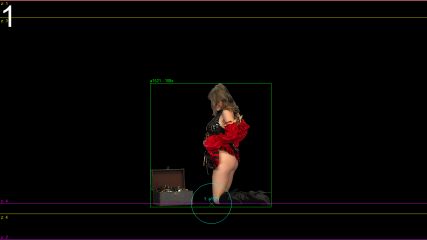
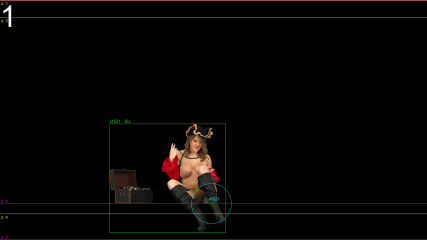
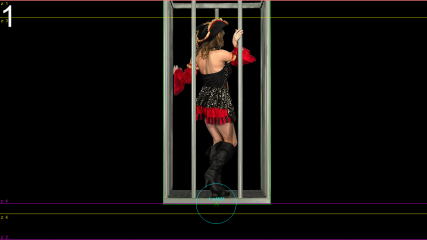
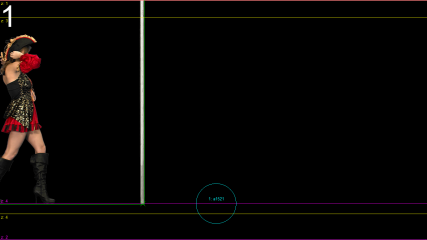
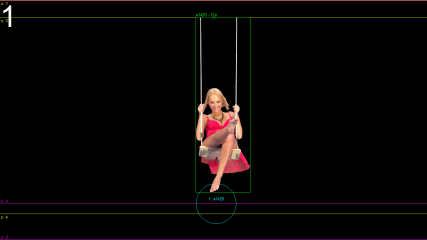
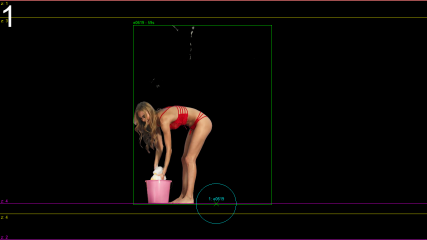
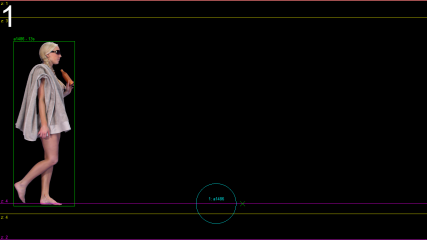
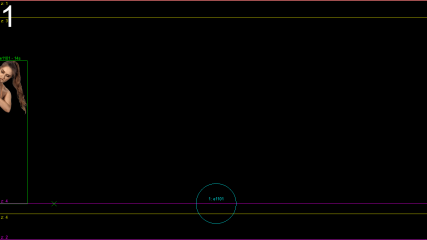
Hot Spots - Small Green X marks the Spot
Standing Clip - center bottom
Table Clip - center Ledge of table
Pole and Cage clip - bottom center of pole / cage
In/Out Pole Clip - bottom Center of Pole Shifted to Screen edge minus (1/2 width of Bounding box )
Swing Clip - Top Center of swing. Attaches to the Bottom of a ledge.
Glass Clip - Bottom center of clip varies from clip to clip
older in/out from the side - Shifted to the side of the screen minus width of clip varies from clip to clip
New Style In/out - Shifted to the Side of scree minus width of clip. Varies from clip to clip
You are not allowed to participate yet
As a free user of iStripper, you are not allowed to answer a topic in the forum or to create a new topic.
But you can still access basics categories and get in touch with our community !

